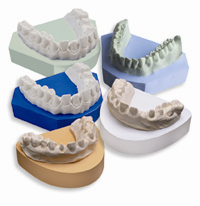
Even with the latest developments in scanning and milling restorations, the use of gypsum based materials is essential to your laboratory processes. An in depth understanding of these materials and their behavior is part of the foundation of success in your business.
It may seem like everyone should be familiar with gypsum usage, but a good review is still beneficial to everyone. First, let’s cover the chemistry:
| CaSO4.2H20 | – CaSO4.1/2H2O | + 1 1/2 H20 |
| Raw Gypsum | Plaster or Stone | Excess Water |
| Calcium Sulfate | Calcium Sulfate | |
| Di-Hydrate | Hemi-Hydrate |
The raw product, either taken from the ground or produced as a by-product of the energy industry is then heated and ground to a powder. In this process, excess water is driven out of the material creating its overwhelming need to get it back!
1. Store Wisely – Remember that all gypsum products should be stored in low humidity cabinets or areas and preferably in sealed  containers. An open 50lb box left on the floor with the liner pulled back is an open invitation for material ruin. “The first half of this box worked great, but now it has problems. I think I got a bad batch”. Chances are that you have a bad storage system in a humid environment. Wall bins are great for access but should not be filled so full that the material sits prior to use, for days on end exposed to the atmosphere.
2. Measure Twice, Mix Once – Measuring accurately and mixing properly are just as critical. 100gr of plaster is not the same in volume as 100gr of die stone. Manufacturers create defined physical properties for each gypsum product. When you change the parameters of Water/Powder Ratio and Mix Time, you also change the other physical properties. If a particular product is not behaving as you would like, it may be the wrong product for your application or you may not be following the instructions correctly. Review the procedures on a regular basis to make sure that you have not drifted from the intended use or handling instructions. Also seek your manufacturer’s technical advice for your application.
3. Clean is Best – If your Clients walked in right now would you be embarrassed to have them in the lab? How would you react if your physician’s medical lab looked like your dental lab? Make sure that your areas and your equipment are clean and in proper working order.
4. Beware of Interactions -Gypsum that has already set acts as a catalyst when in contact with unset gypsum and causes changes in the set and working times. Don’t mix gypsum stones and plasters in the same bowls used for phosphate investments. The phosphate can keep the gypsum from setting properly.
5. Less is More – Other chemistry issues can also affect you. Excessive disinfectant solution or water can give you unset or powdery gypsum at the surface. Make sure that your impressions are clean and only slightly damp before you pour. Excessive use of alcohol based surfactants or debubblizers will also give you surface issues like softness or chalkiness.
6. Eliminate Impression Headaches – Impression materials and their use can be problematic. Do your best to match the linear expansion of your stone to the linear contraction of the impression materials that you receive. Stones generally range from .05% to .3% expansion. Impression materials are being reported from .0018% to .4% contraction, so you can see there is a great possibility of mismatch. If your doctors are constantly complaining of tight crowns you may want to check for a mismatch problem before you change the ratios in your investment materials.
Always check the impressions for problem areas. Tares, voids, unset material, air traps on marginal areas or impinging on the tray (tray show through), all are sources of case failure and should be pointed out to the doctor and noted on the prescription, along with the Dr.’s indication to continue or re-take the impression. Pouring and pulling can damage what you first see; show the doctor the problem in the impression prior to the pour.
7. Presentation Counts – Sloppy gypsum work leaves your practitioner clients with the image that you are a sloppy, non professional laboratory. See that the model work and articulations are smooth, free from excess gypsum and clean. There should not be articulating ink, fingerprints or other unnecessary markings left on the casts when returned to the client.
