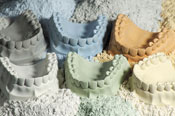
 When a dental lab receives an impression, the technician is tasked with pouring it up. While this process is simple, there a few things that need to be considered. Selecting the right stone from the start and using it correctly can give us a useable model that can survive the fabrication process of the restoration intact. Here is what every dental technician needs to consider in order to get the most out of their gypsum models.
Choosing the right stone
First of all, do we need a scannable stone if we plan on going the digital route? Not necessarily, but choosing a scannable stone will simplify our processing of the case and most likely save on the need to buy expensive scan spray. You will want to avoid resinous stones as they can reflect too much and cause incomplete scans if you plan to scan the model.
Compressive Strength
Second, do I need the highest compressive stone available? While compressive strength is important to a degree, the way it really factors in is when we are packing something like a denture. If we are talking about fixed restorations and we are using any of the die stones going up a few thousand PSI won’t prevent breakage of dies. Breakage can be caused by many things but is not limited to: excessive water when mixing, not allowing the model to set long enough after it is poured and finishing on the die during the fabrication of the restoration.
Water/Powder Ratios
In order to combat excessive water in the mix the stone MUST be weighed. There is no substitute for this as all stones have varying densities as is evidenced by the published varying water powder ratios in the gypsum physical properties chart. The scoop to so many measures of water is for alginate not for gypsum. One option is to buy preweighed envelopes but if this is not desirable then weighing several bags ahead of time is also an easy inexpensive option. All you need is a calibrated kitchen scale and some plastic bags.
Setting Times
Another thing to think about is how long do I let the model set before removal from the impression? This will depend on what type of impression material we are talking about. If we are using alginate, most models can be pulled in 30 minutes or so as we see on the box. If we are referring to a rigid polysiloxane or polyether we may want to wait at least an hour to help avoid tooth breakage. Ideally we want to wait a full hour before trimming to allow for the crystalline structure to form in the gypsum and give the strength needed without adding additional water while trimming. Also, in the first hour we gain about 80% of our final expansion so the 1 hour point is the best time before we begin working with the model. There are a few exceptions such as Lean Rock but generally speaking this 1 hour waiting period will be very helpful on several fronts.
Fabricating Restorations
Once you are satisfied with your working model and it is trimmed, it is time to fabricate your restoration. This can be done by scanning and going the digital rout or the conventional route of doing it by hand, whichever method is chosen at some point, especially if we are dealing with a metal restoration, it will need to be finished. There is a temptation to finish on the die especially at the margin. While this may be convenient and helpful, visually to see the process progress, it is bad news for the die itself. Although the die seems dry to the touch, it does in fact still contain water locked inside. Finishing on the die can cause heat and drive the water out of the stone. The loss of the water weakens the structure and causes breakage. Normally the place at greatest risk is, you guessed it, the margin and once that breaks you are in a situation where you may not be able to verify until you get feedback from the doctor on the fit.
So as you can see, selection and handling according to the directions will help give you a good foundation for any dental restoration. The right tool for the right job used correctly will minimize lost time, resources and added frustration for everyone.
